If your answer is, ‘that’s right, I already I have a full set of complete volunteer paperwork that I used to recruit this person’, then you will not be needing the To Do workflow functionality for that person (as you’ve already done this off-line, so you’ve already got all their completed volunteer application paperwork).
Go to: Toolkit > Manage > Add NewVolunteer.
What you will need to do
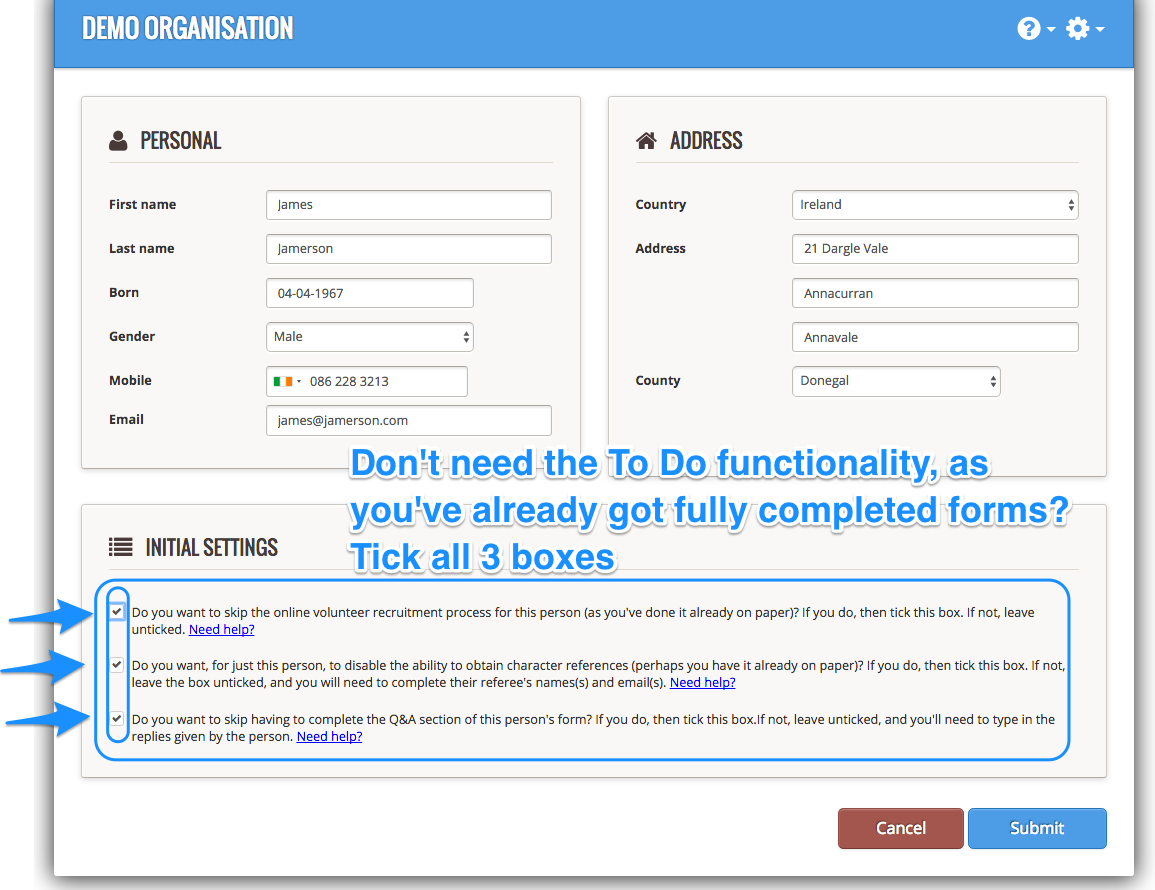
Complete the Personal Details and Address fields displayed on the screen (see the example date for a James Jamerson on the screen below).
On the next screen, you should tick all 3 boxes below:

Press Submit (you’ll see a pop-up message in the top left corner of your screen, to confirm you’ve created a volunteer record for this person)
What you will see now
Go to your Admin Dashboard > Toolkit > Manage > Select the name of the volunteer you just created.
Now you can add any documents or records to their newly created volunteer profile page. Click here to see how.
You will see also in this History section on both
- your Admin Dashboard,
- and the volunteer profile page of this particular person for whom you just created a new volunteer record
that there is a note of the fact that you (as administrator) created a volunteer record for this person.
What you won’t see now
If you go back to your Admin Dashboard, you’ll see that even though you have created a new volunteer record in your Complyfile, you will see that there is no card for this person in any of the To Do steps.
Why? This is because you have indicated that you already have a full set of complete volunteer paperwork for this person, so there is no need for the To-Do’s to be used).